Easy DIY Wall Art for a Modern High-End Look
- TheHomeStyleEdit
- May 5
- 3 min read
Updated: Jul 7
Create Modern, Minimal Wall Art That Looks High-End Without the Price Tag
==========================================================================
This step-by-step guide walks you through everything you need.

A Personal Note
I was searching for something large-scale for my wall. However, everything I found felt either too busy or didn't match my desired aesthetic. So, I decided to create my own.
The goal was simple: keep it minimal, let texture do the work, and create something that feels like it belongs in the space rather than competing with it.
Materials You Will Need
Before starting your project, gather the following materials. This project only requires a few simple supplies.
Pro tip: Artwork should be about two-thirds the width of the surface below it. When in doubt, slightly larger tends to feel more elevated.
Blank canvas
Drop cloth or protective surface
Spackle
Putty knife
Neutral paint (white, beige, or soft tones)
Paintbrush or small roller
Neutral Tone Wall Hooks
Painter's Tape (optional)
Sealer spray to protect finished artwork (optional; highly recommended)
Where to Shop for Materials
You can find everything you need on Amazon or at your local craft store. To make it easy, I’ve linked my favorite finds below.
Some of the links below are affiliate links, which means I may earn a small commission (at no extra cost to you). I only share products I personally use and love.
Everything I Used is Linked Below
Step-by-Step Instructions for Creating Luxe Modern Canvas Art
Follow these steps to create a piece that looks professionally made but is simple enough for beginners.
Step 1: Prepare Your Workspace and Canvas
Cover your workspace with a drop cloth or newspaper. Place your canvas on a flat surface.
Optional: I used painter’s tape around the edges to keep the lines clean and intentional—one of those small steps that makes the final result feel more polished.

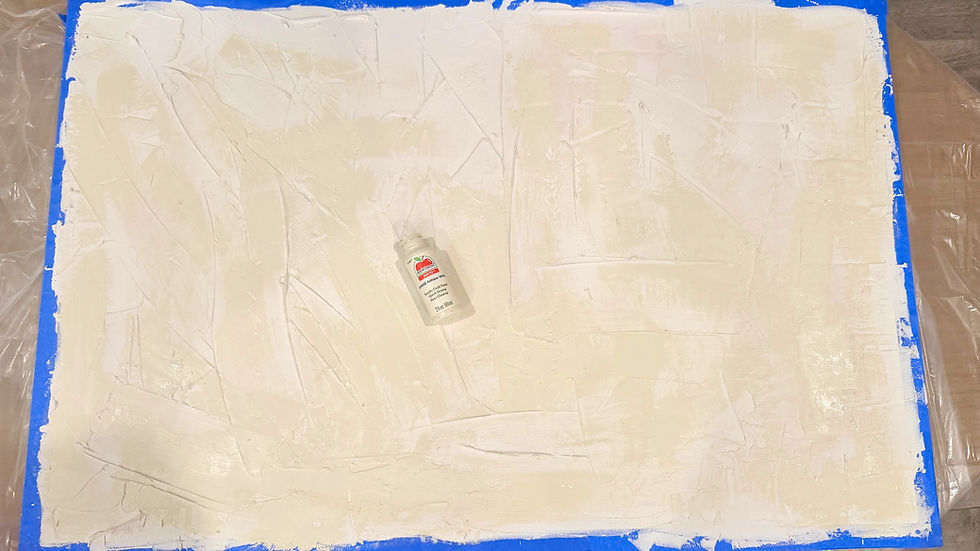
Step 2: Add Texture
Using a putty knife, spread the joint compound across the canvas.
There’s no perfect method here. Soft, imperfect texture tends to feel more natural and elevated than anything too precise. Try to keep the design minimal rather than overworked.

Step 3: Let It Dry
Once the joint compound is fully dry (about 2–4 hours), you’re ready for the next step. One thing I love about this spackle is that it goes on pink and dries white, so there’s no guessing when it’s dry.
Step 4: Add Paint
I applied a soft layer of neutral paint across the canvas, leaving a few areas untouched to create subtle contrast and depth.


Step 5: Add More Texture
Once the paint dried slightly, I went back in with more joint compound to add extra texture and dimension.

Step 6: Add More Paint
Once the extra texture dried, I added another light coat of white paint to pull everything together. This helps soften the texture while still keeping that layered look.

Step 7: Remove Tape
Carefully peel back the painter's tape at a 45-degree angle while the paint is still slightly damp for the cleanest edge. Let it dry completely before moving to the next step.
Step 8: Seal Your Artwork
After the paint is completely dry, spray a light coat of sealer to protect your work.

Styling Tips for a Clean, Minimal Home Aesthetic
Your new canvas art will look best when styled thoughtfully. Here are some tips to keep your space feeling fresh and modern:
Choose neutral or muted colors in your art to complement a minimalist palette.
Keep wall space uncluttered by hanging one or two large pieces rather than many small ones.
Use simple frames or no frame to maintain a clean look.
Pair your art with natural textures like wood, linen, or stone for warmth.
Position art at eye level for maximum impact.
Balance with negative space around the artwork to avoid visual clutter.
Final Thought: Styling is less about adding more and more about placing things with intention. Simple pieces, placed well, often have the most impact.
Recommended Products for Styling and Display
Conclusion
Creating modern, minimal wall art is a rewarding project. It allows you to express your style without breaking the bank. By following these steps, you can achieve a high-end look that enhances your space. Remember, the key is to keep it simple and intentional. Enjoy the process, and let your creativity shine!
Easy to follow! Love the results!